A few weeks ago I attended the CUE Rockstar Admin camp in San Diego. While I was there I was able to connect with a few other Directors of Technology and share some best practices. Today I wanted to share a very easy to implement tip that I learned during one of those conversations.
One of my big goals this year is to help people work more efficiently. There are only so many hours in the day and most of us have lives and outside of work commitments that need our attention. This means that working efficiently is very important. One of the ways that we can work more efficiently is to be organized. This is especially important for leaders because we get bombared constantly with requests and people wanting our time. If we are unorganized it becomes very difficult to work efficently when we do get free time to work. Don’t believe me? Check out this quote below.
Many workers spend as much as 20% of their work week looking for internal information that they need to accomplish tasks, whether that’s digging through folders of documents or tracking down a colleague to answer their questions.
Source
When I was a site administrator I always stressed that we needed to be organized so information was easy to find. I introduced to my organization the idea of creating a staff portal to act as a table of contents for our Google Drive and important websites. I also made sure that we pushed people towards using the portals….not an easy task at first. Now as the Director of Technology for multiple sites I am looking at ways that we can globally manage our information and make sure that people have the necessary information on Day 1. That is why I was very excited to learn about managed bookmarks in Chrome.
Why Managed Bookmarks?
Below are some of my goals in pushing out manged bookmarks to my staff and ultimately students.
- Never have to hear “What’s the url again?” when it comes to our day to day organization websites.
- Make sure that it is easy for people to find new web resources we want them to use.
- Make onboarding easier. Instead of having to provide a piece of paper or email with all of the websites we use, I now can log them into Chrome when I am setting up their laptop and have everything ready to go on Day 1.
- For my teaching staff, they will no longer have to wait for students to manually try and enter a website into the Omnibox which of course they end up spelling wrong which means valuable class time is lost. Now they can just instruct the students to log into Chrome and then automatically get the list of sites they need.
What are Managed Bookmarks?

Imagine that you had the time to go around to all of your computers and put a custom bookmarks folder that contains all of your important websites. While this would take forever to accomplish it would, in the long run, save you so much time because users would be able to quickly get the information that they need. Lucky for us Chrome makes setting up these custom bookmark folders easy with Managed Bookmarks.
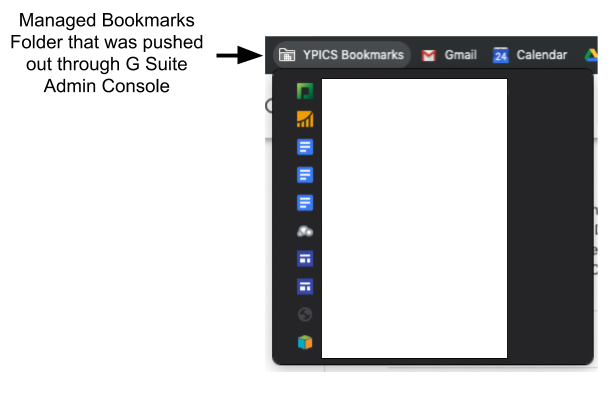
Managed bookmarks are bookmarks that your G Suite administrator creates that can be pushed to users. When you push the bookmarks to a user it shows up in their Chrome Bookmark bar as a folder like in the picture above. The folder is dynamic so any time you make modifications in the admin console they are quickly reflected for the user.
Pushing out Managed Bookmarks
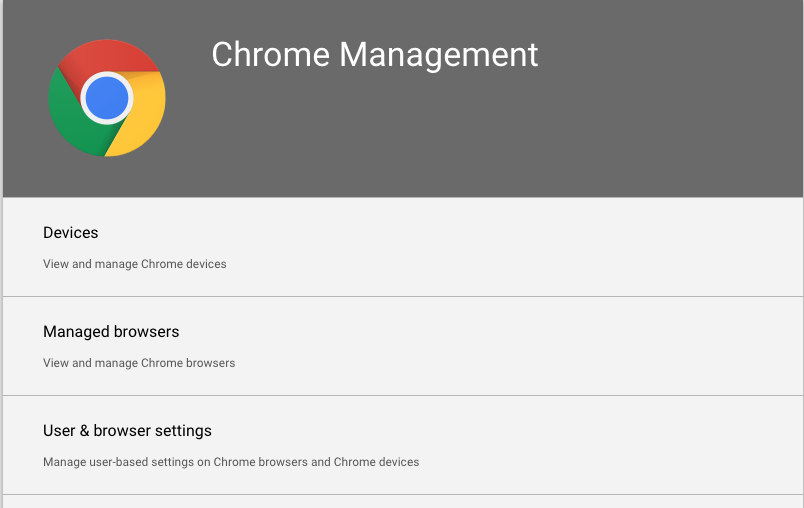
To push out a folder of managed bookmarks you need access to the Chrome management section of the Google Admin Console. To access the Chrome management section click on the three lines in the top left-hand corner, then scroll down to devices, click on the > next to Chrome management, and then click on settings. That will open up the screen below. Once you see this screen click on User & browser settings.

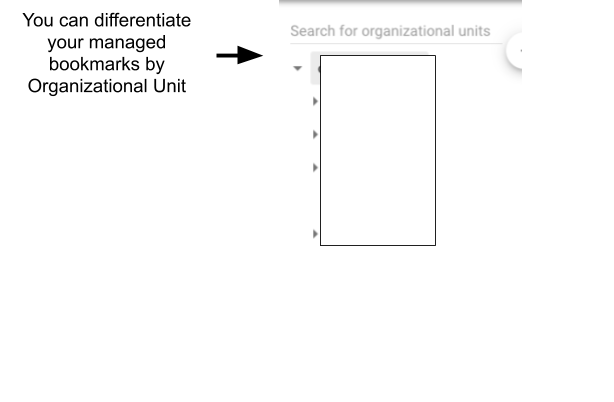
The first thing you will notice on the next screen is that your organizational units are brought up on the left-hand side. When creating managed bookmarks you can differentiate what bookmarks people get by selecting on the different OUs. For example, in my domain, I have our middle school and high school staff in separate OUs. Since it was set up this way I was able to push out two different sets of bookmarks to each school. This allows me to customize them to meet their needs. One of my goals next year is to push out a series of managed bookmarks to our students so they have all of the links they need.

After you have selected the OU that you want to push the bookmarks to you will need to find the section called User experience. It is pretty far down on the page of settings so I would suggest using a Command + F to open the find search. I normally find this section by typing “exper”.

The next step is to name your Bookmarks folder. Keep in mind that the end-user will see this name so you want to make sure you keep it professional. In my organization, we have titled our folder YPICS Bookmarks since YPICS is the name of our CMO. After you have named the folder you can click on the plus sign to add bookmarks.

To add a bookmark you need a name (this will show up for the end-user) and a URL. One frustrating part of adding bookmarks is that you can not drag and drop to reorder the bookmarks. I ended up creating a list in a Google Sheet of all the names and URLs so I could do all of my organizing before I entered them into the system.
When you are done entering all of your bookmarks make sure you hit save in the top right-hand corner.
Troubleshooting Tips
My experience so far is that it takes maybe 2-3 minutes for end-users to see the bookmarks in Chrome. Below are some common issues that came up when I pushed out the folders
- If they can not see the bookmarks make sure that they are logged in using your school domain account.
- If they are logged in and still can not see the bookmarks make sure that they are syncing Chrome.
- If they still can not see the bookmarks pull up their account in the Admin Console and make sure they are in the correct OU.
If you need any help setting this up please don’t hesitate to reach out! You can reach me by visiting my contact page.
Very interesting
I need learning
I need used for student when you teaching
Bookmarks is excellent used for teachers